What Are Datums?
A datum is a theoretical reference point, line, or plane used to define where measurements and controls should originate on a part. Datums are critical because they establish a consistent frame of reference for defining size, location, orientation, and form in GD&T.
Think of datums as the “anchors” that stabilize and define your part’s orientation in space. They are not physical features but are derived from physical surfaces, edges, or axes of the part. These references enable manufacturers and inspectors to precisely measure the part relative to a defined and consistent framework.
Why Datums Matter in GD&T
Datums ensure that parts fit and function as designed by providing a standardized framework for controlling features in a part. They allow for accurate communication of the designer’s intent from the drawing phase through production, reducing the likelihood of misalignment or incorrect measurements during inspection.
Without properly defined datums, there would be no reliable reference point for measuring or controlling features, leading to variations in part production and potential assembly failures. Datums also play a critical role in ensuring that features such as holes, slots, and surfaces are measured and located consistently, regardless of where or by whom the part is manufactured or inspected.
Introducing Degrees of Freedom (DOF)
To fully understand the importance of datums, it’s necessary to introduce the concept of Degrees of Freedom (DOF). In three-dimensional space, any part can move in six different ways:
- Translational Movement (3 degrees of freedom):some text
- Along the X-axis (left and right)
- Along the Y-axis (forward and backward)
- Along the Z-axis (up and down)
- Rotational Movement (3 degrees of freedom):some text
- Around the X-axis (tilting forward or backward)
- Around the Y-axis (tilting side to side)
- Around the Z-axis (twisting clockwise or counterclockwise)
These six degrees of freedom describe all possible ways a part can move. Datums are used to systematically constrain these movements, ensuring that the part is held in a stable and repeatable position for both manufacturing and inspection.
How Datums Constrain Degrees of Freedom (DOF)
When a datum is applied to a feature on a part, it constrains specific degrees of freedom, progressively locking the part in place to ensure its proper orientation and location. Let’s look at how this works:
- Primary Datum (Datum A)
The primary datum typically constrains three degrees of freedom. This datum is usually a large, flat surface or stable feature that restricts:- Movement along the Z-axis (up and down).
- Rotation around the X-axis (forward/backward tilt).
- Rotation around the Y-axis (side-to-side tilt).
- Secondary Datum (Datum B)
The secondary datum constrains an additional two degrees of freedom:- Movement along the Y-axis (forward/backward).
- Rotation around the Z-axis (clockwise/counterclockwise twist).
- Tertiary Datum (Datum C)
The tertiary datum typically constrains the final degree of freedom:- Movement along the X-axis (left/right).
By the time all three datums are applied, the part is fully constrained, meaning it can no longer move in any of its six degrees of freedom. This level of control is essential for ensuring parts align correctly in assemblies or during inspection.
Exceptions to the rules mentioned above:
- It doesn't have to be ABC: While datums A,B,C are customary, these are not required. They could for example be F,E,D or any other letter combination. The order of precedence is based on usage in the feature control frame.
- It’s not always 6 degrees of freedom: In some situations you may not want to constrain all six degrees of freedom. For example, you may have a part that rotates about some axis and as a result only needs five degrees of freedom constrained; to do so you may only require one or two datums.
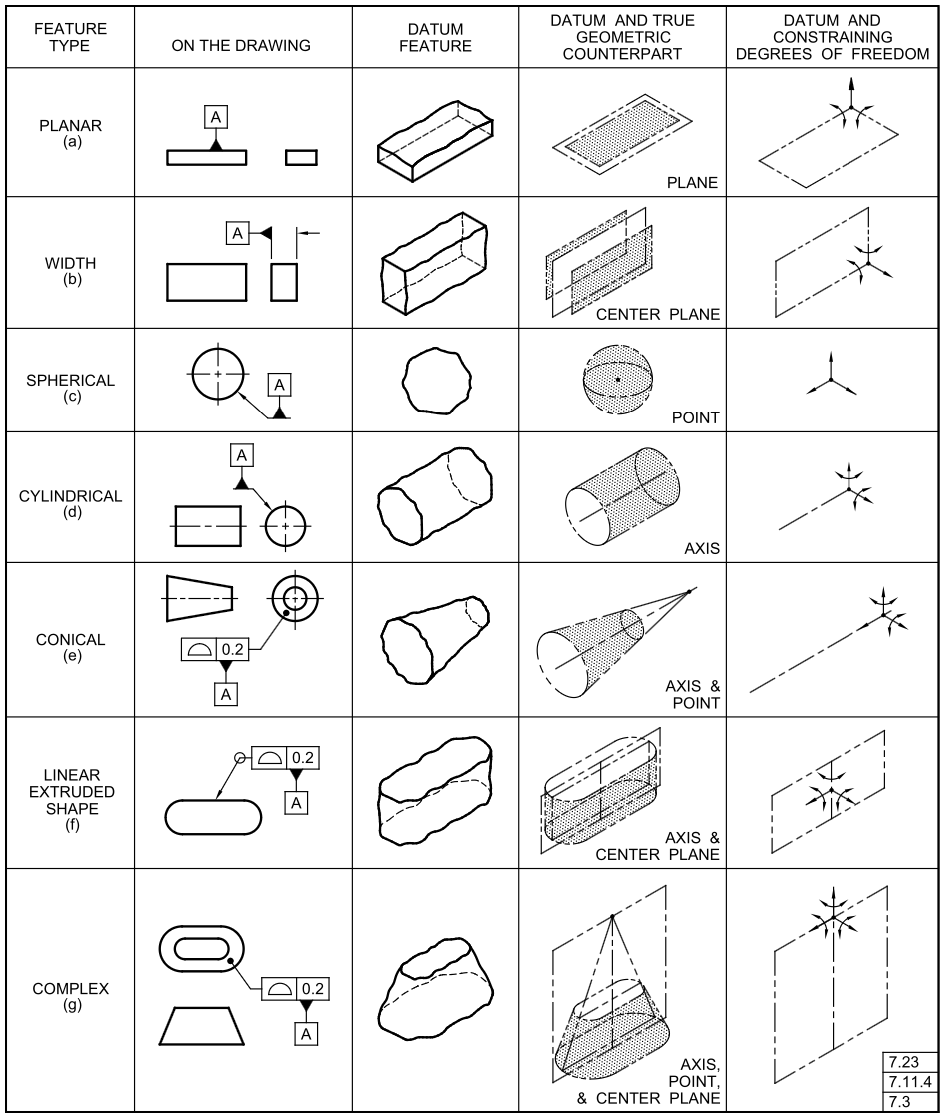
- Different features constrain different degrees of freedom: The degrees of freedom constrained are variable based upon the geometric feature you select as a datum. For example, a plane will typically constrain three degrees of freedom (one translational, two rotational); whereas a cylinder will constrain four degrees of freedom (two translational, two rotational.)
Example: A Simple Bracket
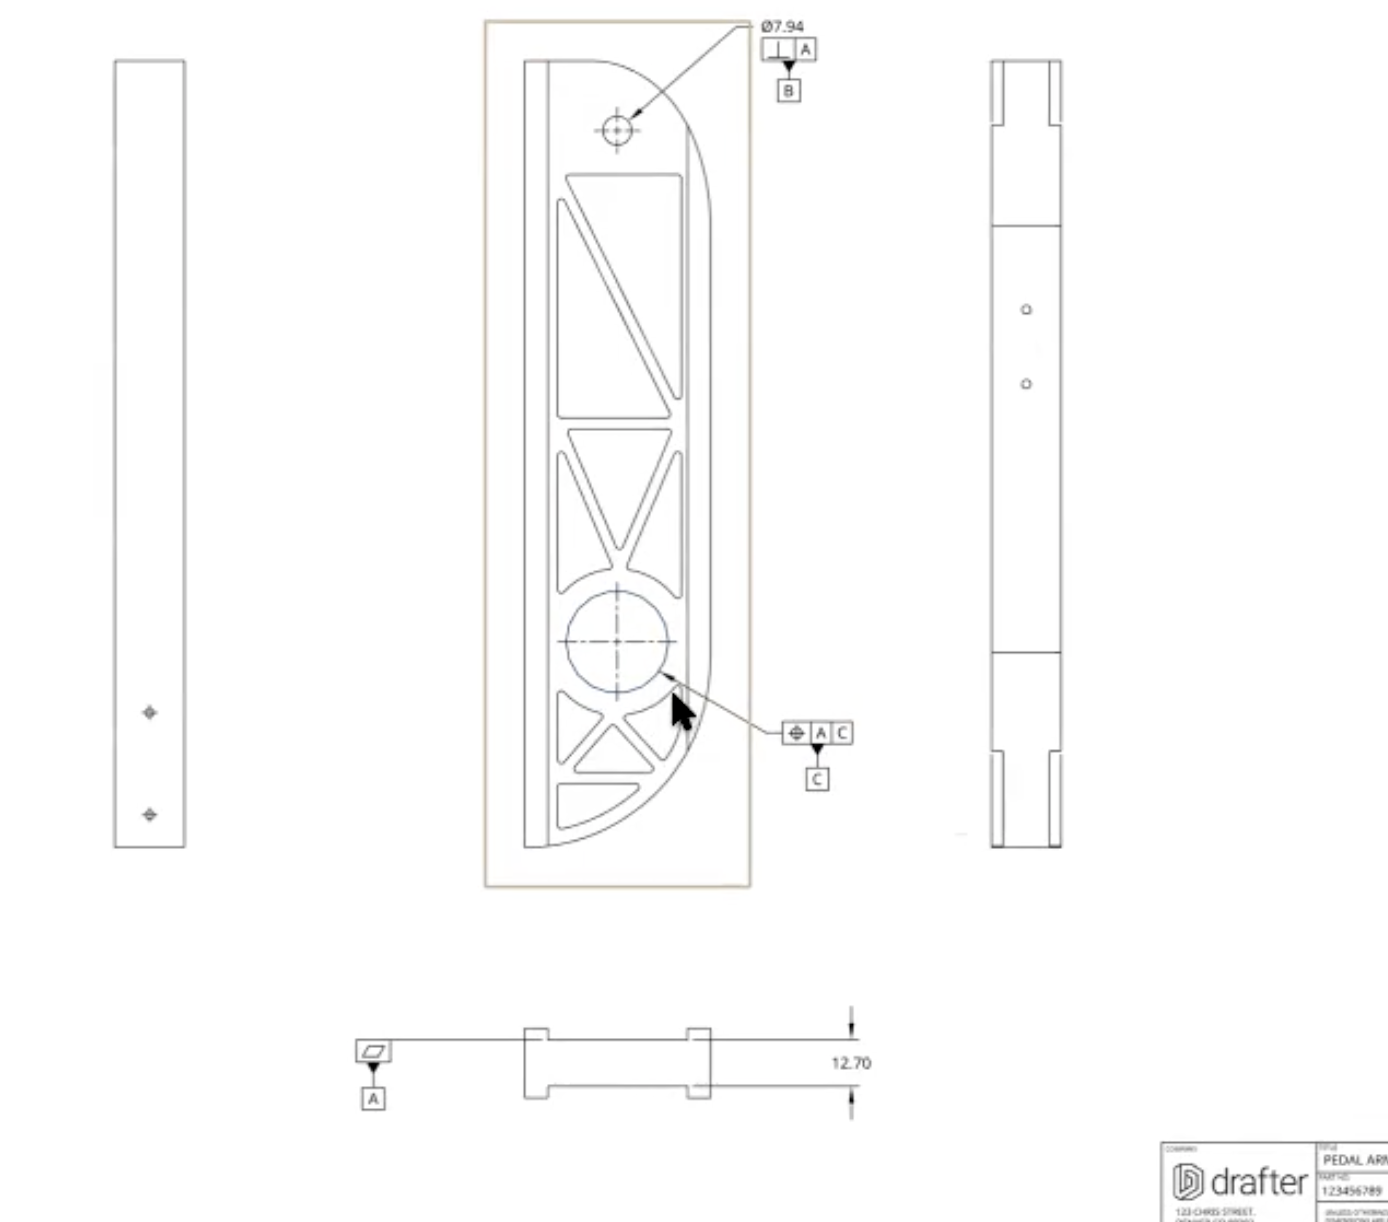
- Datum A could be the flat mounting surface of the bracket, preventing movement along the Z-axis and tilting.
- Datum B might be the bolt hole that aligns the bracket to its mounting surface, further restricting forward/backward movement and rotational twist.
- Datum C could be a secondary hole or feature that constrains side-to-side movement.
How Preceding Datums Influence Later Datums
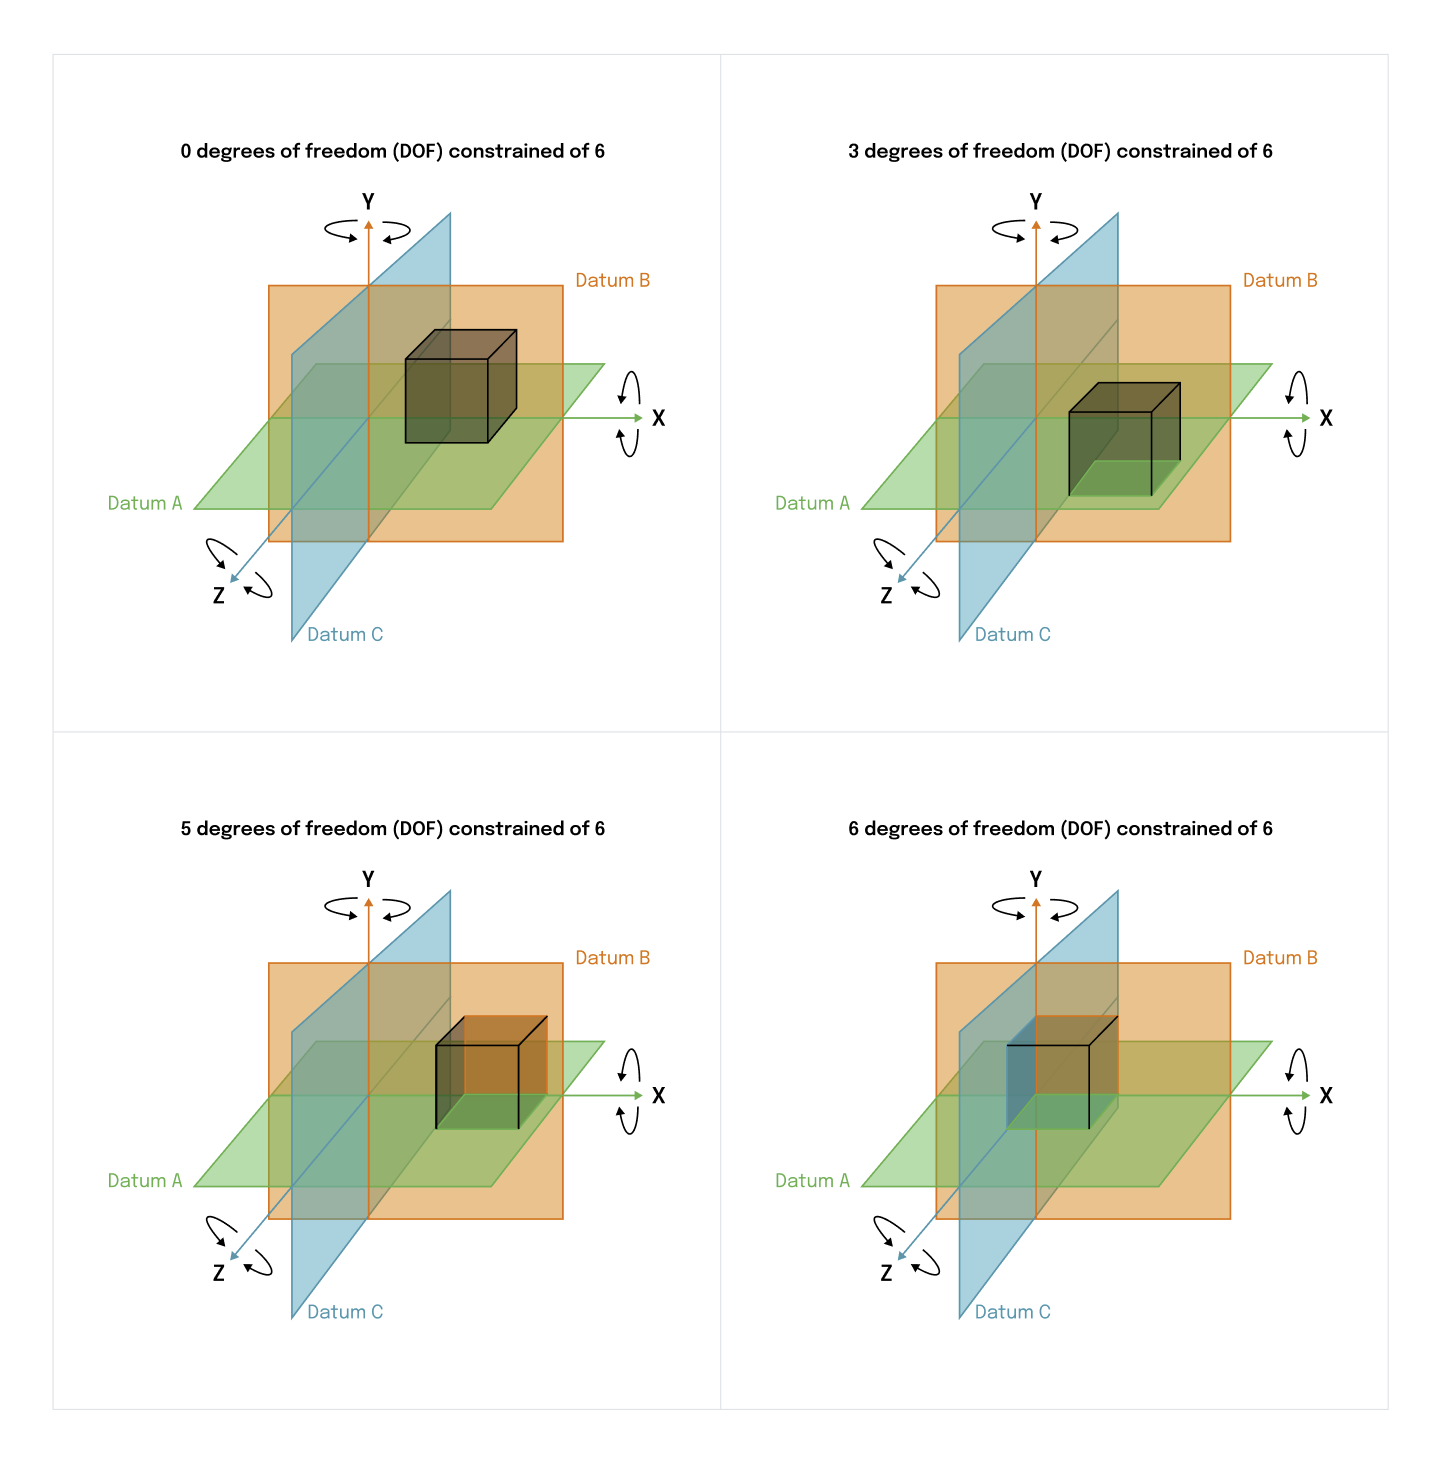
Each datum selection influences what degrees of freedom are controlled by subsequent datums. Once a primary datum is established, it significantly restricts the part’s movement. The secondary datum is then used to restrict additional movements that haven’t yet been constrained by the primary datum.
This hierarchy of constraint ensures that the part is controlled in a logical order:
- Primary Datum (Datum A) locks down the most significant degrees of freedom.
- Secondary Datum (Datum B) complements the first by controlling the remaining major movements.
- Tertiary Datum (Datum C) typically refines the control, constraining any remaining degrees of freedom.
It’s important to avoid “over-constraining” the part—adding unnecessary datums that duplicate the control of an already-constrained movement. This can lead to manufacturing difficulties and increased costs.
Best Practices for Selecting Datums
Choosing the correct datums is essential for maintaining both function and manufacturability. Here’s a practical guide:
- Functionality is Key
Select datums based on how the part will function in its assembly. Features that interface with other parts, such as mating surfaces or holes, should be considered first. - Stability is Essential
Larger, stable surfaces or features make excellent primary datums because they provide the most reliable foundation for constraining the part. - Consider Assembly Requirements
Think about how the part will be assembled. For example, if a part bolts onto a surface, the flat mounting surface should likely be your primary datum (Datum A), and the bolt hole should be your secondary datum (Datum B). - Sequence Your Constraints
Select datums in a logical sequence. Start by controlling the most important movements (those affecting fit and function) with the primary datum and proceed to constrain the remaining degrees of freedom with subsequent datums.
Example: Selecting Datums for a Flange
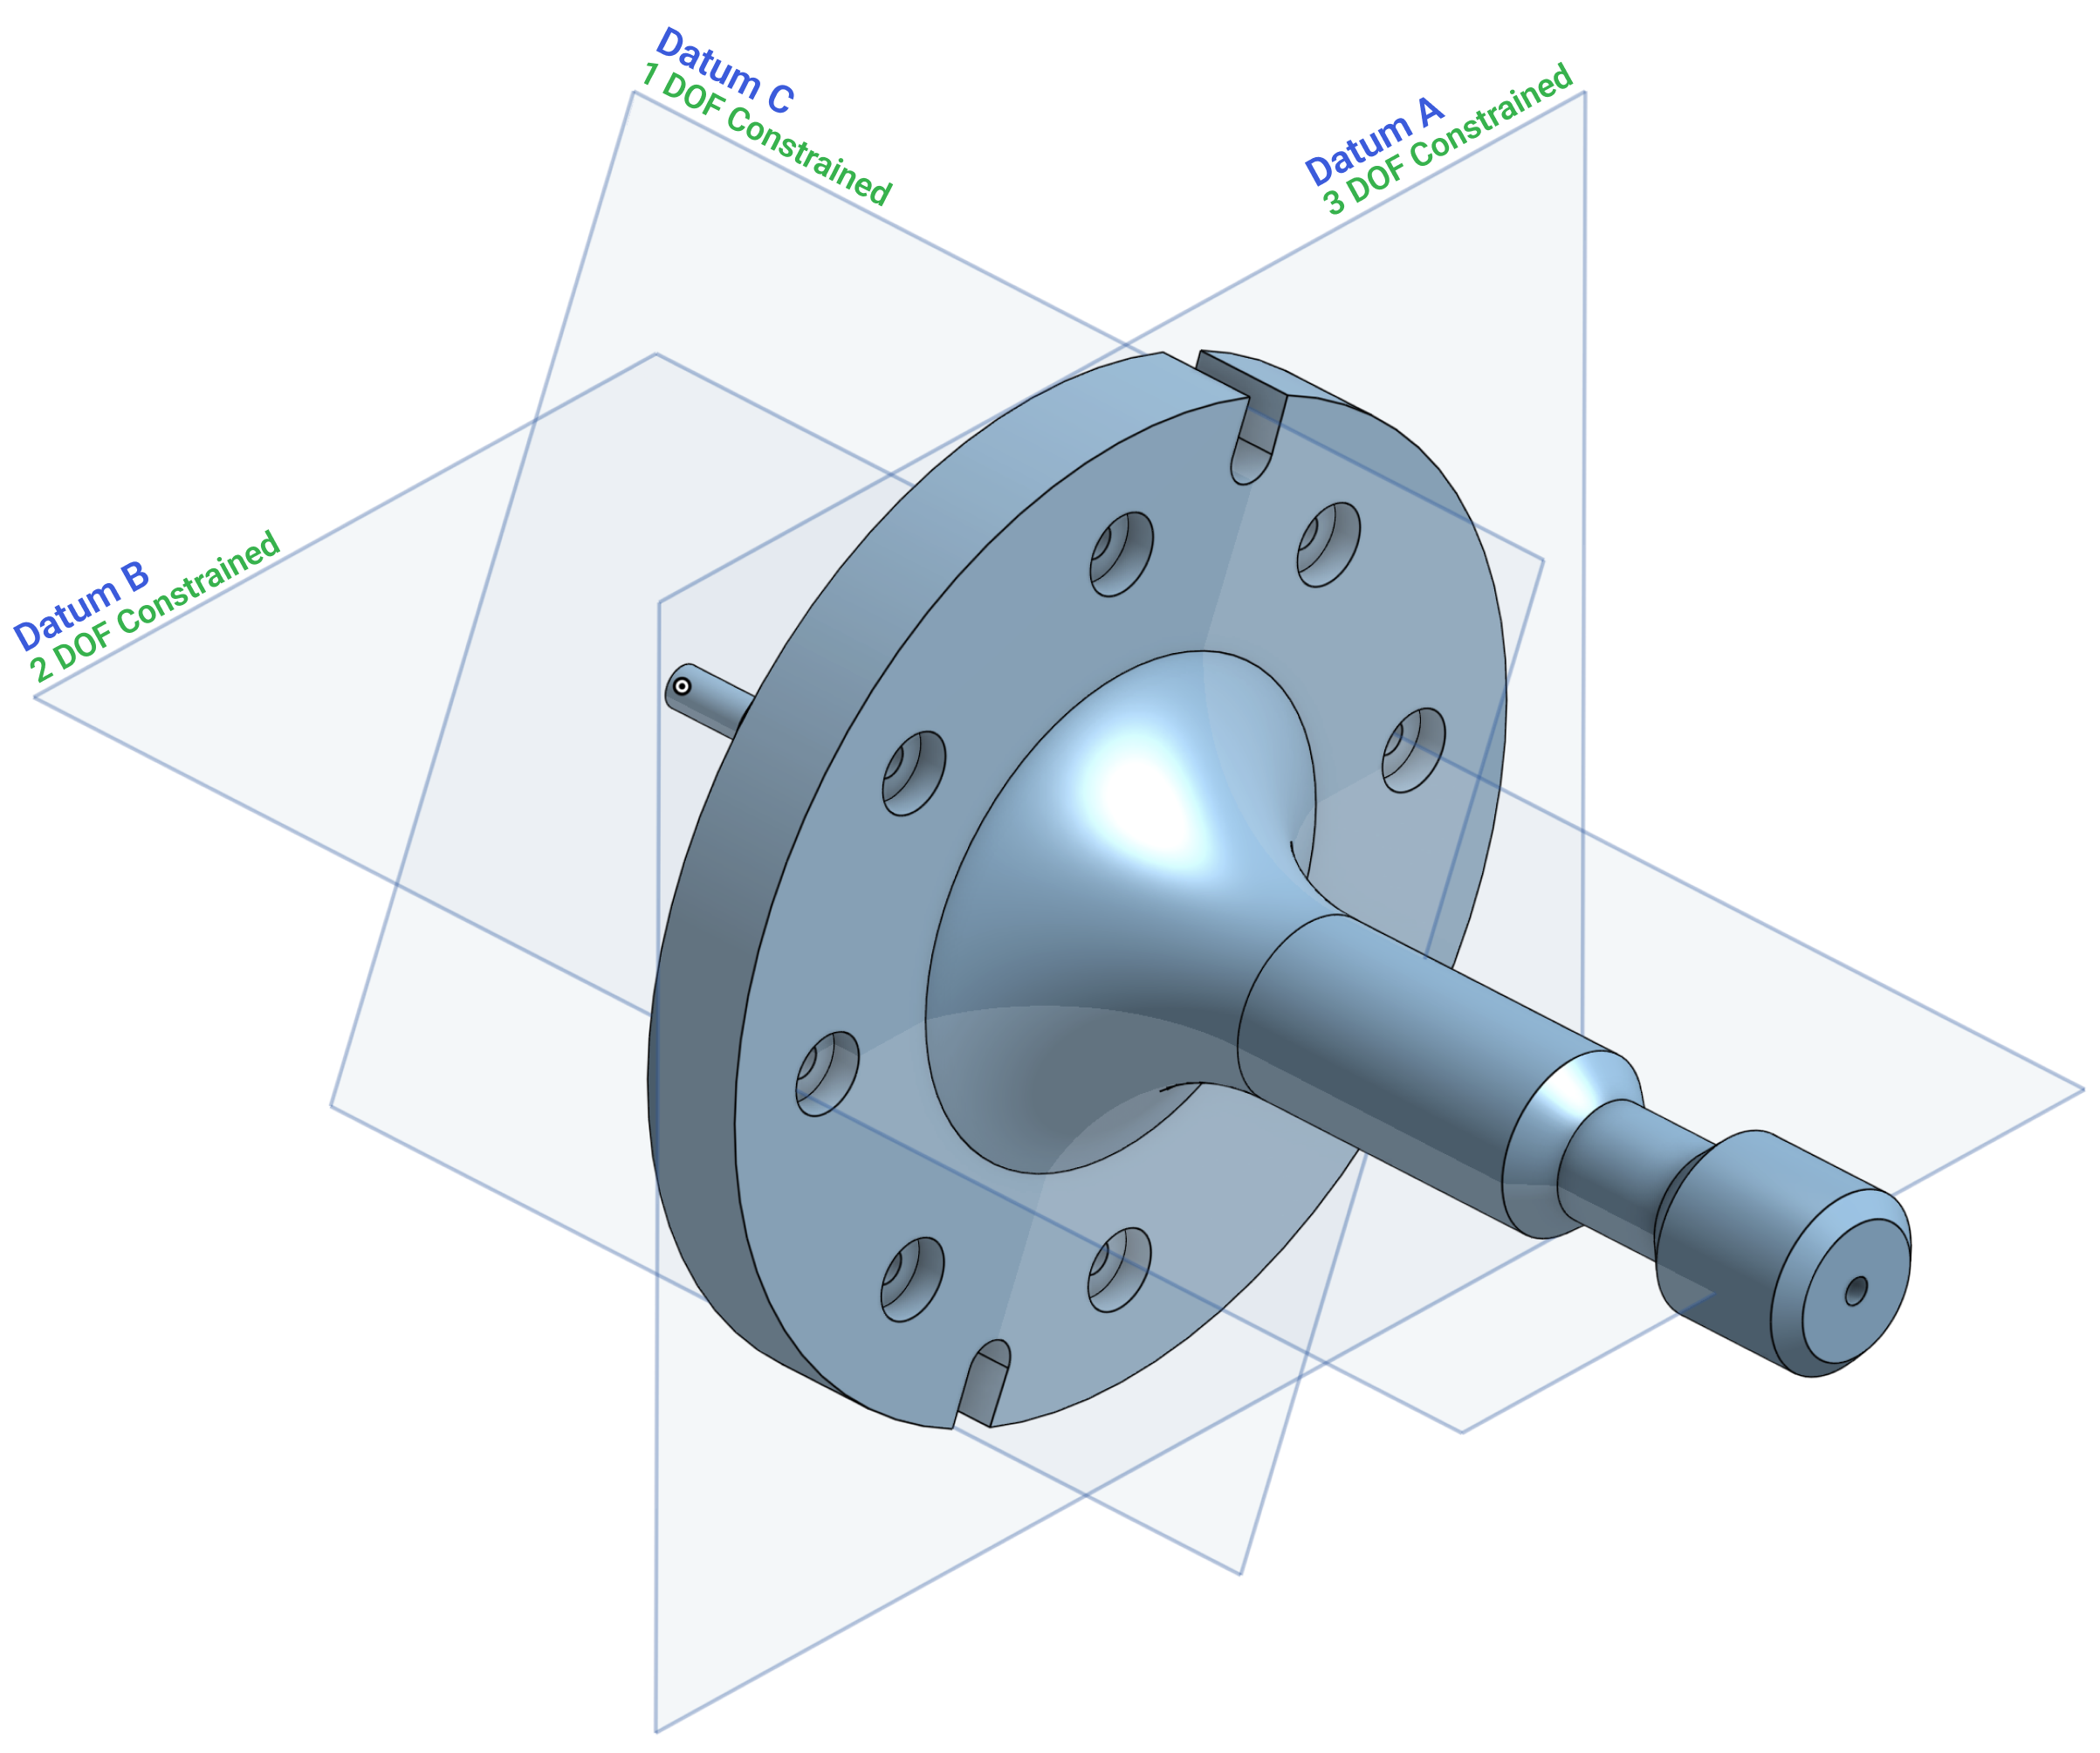
- Datum A: The flat mounting surface, which interfaces with another part.
- Datum B: A bolt hole that aligns the flange with the mating part.
- Datum C: A secondary hole or edge used to control side-to-side movement.
How Datums Are Used in Inspection
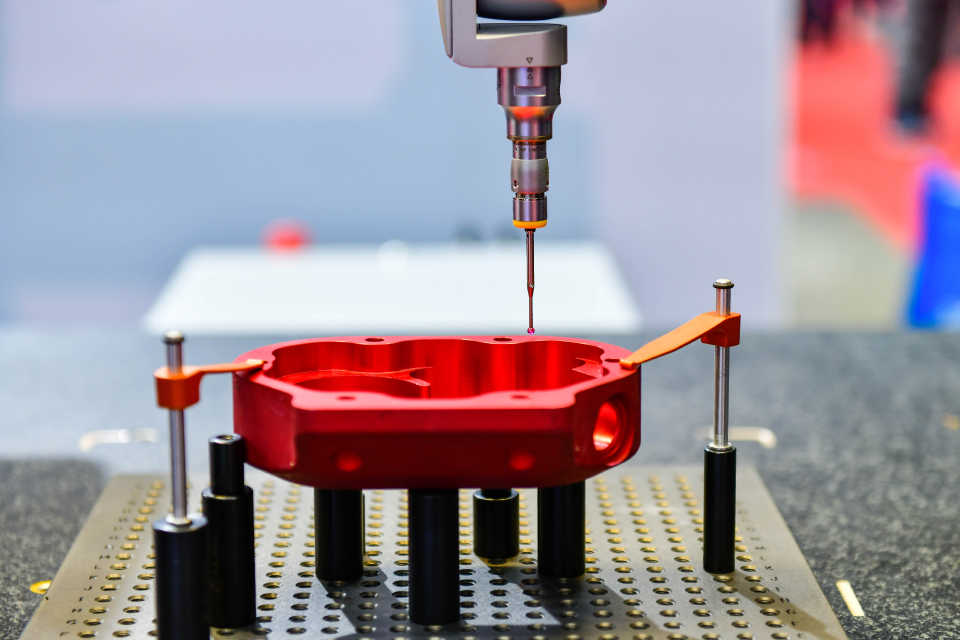
Datums are just as critical in inspection as they are in design. When parts are inspected, datums provide the frame of reference for measurement. Here’s how the process works:
- Aligning the Part
The part is positioned in alignment with its datums. The inspector will usually start by fixing the part according to Datum A, constraining three degrees of freedom, and then align the part further using Datum B and Datum C. - Measuring Features
With the part fully constrained, critical features—like hole positions, surfaces, and form—are measured against the datum reference frame (DRF). - Repeatability
Because datums create a stable reference frame, they ensure that every part is measured the same way, producing consistent, repeatable measurements across production runs.
Why Datums and Degrees of Freedom are Critical to GD&T
Datums are essential for controlling the geometry of parts in GD&T. By constraining a part’s degrees of freedom, datums ensure that features are measured and positioned accurately, both during manufacturing and inspection. Selecting the right datums requires understanding how the part functions, how it will be assembled, and how its degrees of freedom must be controlled.
When used properly, datums guarantee that parts fit and function as intended, reducing the risk of assembly failures, minimizing manufacturing errors, and ensuring consistency across production.
By mastering the use of datums and degrees of freedom, you’ll gain greater control over your designs and improve communication with your manufacturing team, leading to higher-quality products with fewer costly revisions.
This article discusses normal datums, for functional datums more to come soon.


